
Is your Ninja CREAMi power button blinking? You may not have a serious fault. In many cases, the machine detects an assembly problem or another safety condition.
First, identify the light that blinks. Then check the bowl, lid, pint, and Creamerizer paddle before you try a reset. My approach is simple: start with the safest checks, then move on only when needed.

What does a blinking Ninja CREAMi light mean?
The answer depends on your CREAMi model. On the original NC300 series, Ninja says a flashing INSTALL light points to the outer bowl, while a steady INSTALL light tells you to check the paddle.
Newer CREAMi models can use different indicator patterns. So, check your exact owner’s guide before you treat one light pattern as universal.
If the power button itself blinks, start with the same safe checks. Turn the unit off, disconnect power, and make sure every removable part sits in the correct position.
Quick answer: why is my Ninja CREAMi blinking?
Most blinking warnings relate to assembly, detection, or an abnormal stop. The outer bowl, lid, pint, and paddle must sit correctly before the machine can run.
If the warning appears after an overload, let the unit cool first. Then follow the reset steps in your model’s manual, and never bypass a safety switch.
1. Reinstall the outer bowl
Start with the outer bowl because many CREAMi models use it as part of the safety check. Remove the bowl, inspect the locking area, and reinstall it according to your model’s markings.
Make sure the handle reaches the correct locked position. If the light stops blinking, you likely had an alignment or installation issue.
2. Check the Creamerizer paddle
Next, inspect the Creamerizer paddle inside the lid. Make sure it sits firmly in its holder, and look for cracks, bends, or other damage.
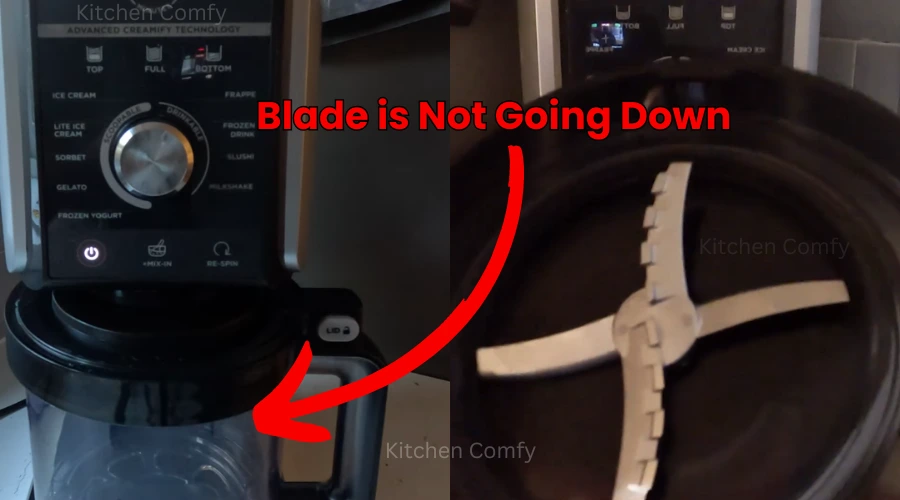
Do not force the paddle into place. If you also notice a blade problem, read our guide on how to fix a Ninja CREAMi blade that is not going down.
3. Check the pint and lid alignment
Look at the pint, lid, and outer bowl as one assembly. A lid that sits unevenly can stop the machine from detecting the parts correctly.
Also check for ice, dried food, or debris around the locking points. Clean the removable parts as Ninja recommends, then dry them before you reassemble the unit.
If your lid already feels stuck, read our guide on how to fix a stuck Ninja CREAMi lid. It covers common causes and safe removal steps.
4. Follow the correct startup sequence
Some original CREAMi instructions specify a particular order for plugging in the unit and installing the outer bowl. This detail matters on older models.
Check your exact manual and follow its startup sequence. Do not assume that every CREAMi generation uses the same order.
5. Clean the locking points
Small bits of frozen food can stop a part from sitting flush. Unplug the machine, then inspect the bowl, lid, paddle area, and visible locking points.
Use the cleaning method that Ninja recommends for your model. Keep water away from the motor base, and never open the base to clean electrical parts yourself.
6. Reset the machine after an overload
A blinking light can appear after an abnormal stop or motor overload. If the machine stopped during a cycle, turn it off and unplug it before you inspect it.
Give the unit time to cool, then follow the reset procedure in your manual. For some NC300-series models, Ninja advises a 15-minute cooldown after overheating.
My rule here is simple: stop if the machine feels unusually hot, smells electrical, or makes a grinding sound. Let it cool, and contact Ninja support instead.
7. Test a known-good outlet
After you check the assembly, test the CREAMi with a known-good outlet. This can rule out a power-source problem without opening the appliance.
If the same warning remains, stop troubleshooting inside the machine. Keep your model number, purchase information, and exact light pattern ready when you contact Ninja support.
What if the CREAMi starts blinking during a cycle?
Treat a warning during a cycle more seriously. Stop the machine, and do not force the bowl, lid, or paddle while the motor runs.
Once the unit stops, disconnect power and check for an obvious assembly problem. If you hear grinding, smell something electrical, or see damage, stop there and contact Ninja.
You can also read our guide on what to do when a Ninja CREAMi blade falls off. It can help if the paddle or blade has become loose.
Why you should never bypass the safety mechanism
The CREAMi uses assembly checks to stop the appliance when parts sit in the wrong position. These checks protect you and the machine.
Do not tape down a switch, hold a sensor by hand, modify the lid, or run the machine without required parts. A shortcut can create an injury risk or damage the appliance.
Ninja CREAMi blinking light checklist
- Identify the exact light that blinks.
- Check the manual for your model.
- Reinstall the outer bowl.
- Check the pint and lid alignment.
- Secure the Creamerizer paddle.
- Remove visible food or ice from locking points.
- Follow your model’s startup sequence.
- Cool and reset the machine after an overload.
- Test a known-good outlet.
- Stop and contact Ninja if the warning remains or the appliance shows damage, overheating, unusual noise, or an electrical smell.
My troubleshooting perspective
When I troubleshoot a blinking CREAMi, I do not start by blaming the motor. I start with the parts the machine can detect: the bowl, lid, pint, and paddle.
That approach saves time and avoids unnecessary handling. It also lets you rule out simple assembly issues before you consider a service problem.
I also prefer model-specific advice over one-size-fits-all instructions. CREAMi generations use different controls and indicator patterns, so the owner’s guide should always win when its instructions differ.
Frequently asked questions
Why is my Ninja CREAMi blinking and not starting?
Start by checking the outer bowl, lid, pint, and Creamerizer paddle. A model-specific assembly warning can stop the machine from starting.
Why is the Ninja CREAMi INSTALL light blinking?
On the original NC300 series, Ninja says a flashing INSTALL light means the outer bowl needs attention. Remove it, reinstall it correctly, and check that it locks fully.
Why is the INSTALL light solid?
On the original and Deluxe documentation, a steady INSTALL light can point to the paddle. Check that the paddle is present, secure, and undamaged.
Can I use my Ninja CREAMi if the light keeps blinking?
No, you should fix the warning before you run another program. If you cannot identify the cause, contact Ninja support instead of bypassing the safety system.
Should I unplug the Ninja CREAMi before checking the paddle?
Yes, turn the unit off and disconnect power first. Then handle the paddle, bowl, lid, or other moving parts.
Final thoughts
A blinking Ninja CREAMi power button does not always mean the appliance has failed. In many cases, the machine needs you to correct an assembly issue or follow a model-specific reset procedure.
Start with the outer bowl, then check the lid, pint, and paddle. If the warning stays after those checks, stop testing the machine and contact Ninja support with your model number and light pattern.
For more CREAMi troubleshooting, read our guides on a blade that will not go down, a stuck lid, and a blade that falls off. These related guides can help you narrow down the problem before you seek service.
Last reviewed: September 2026. Indicator behavior can vary by CREAMi model, so always follow the owner’s guide for your exact unit.

JAKARIA is a seasoned expert in kitchen appliances and cooking techniques. With years of hands-on experience and in-depth knowledge, he has a knack for solving common kitchen appliance issues. He also offers expert guidance to help you achieve culinary success and create amazing meals effortlessly.