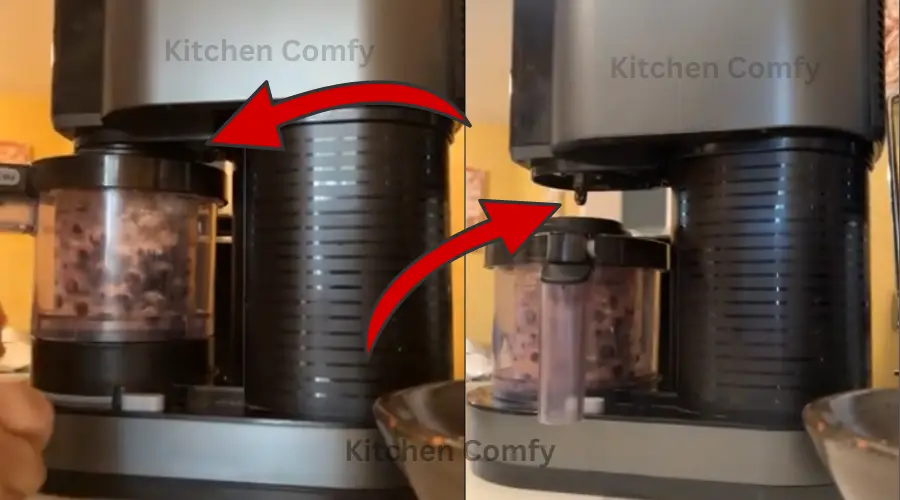
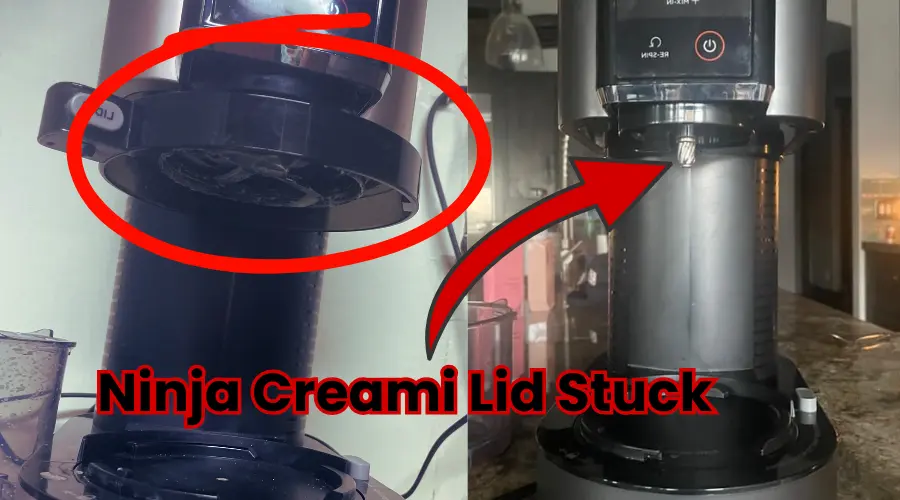
Yesterday, I woke up in the morning and made blended fruit and ice smoothies like other days with my Ninja Creami. But when I tried to get off the food jug/container I saw the Ninja Creami lid stuck to the machine. Are you also struggling to unstick the lid from the machine?
This might happen because of overfilling, ice buildup, food debris, temperature differences, etc. Don’t worry, you can fix it by yourself after reading this blog post. Detach the container from the Ninja Creami > leaving the lid on the machine > unlatch the blade > Clean and Dry > and try to get off the lid to unstick it.
Let’s explore 5 reasons why the cap or lid is stuck on the machine and 5 steps to fix the stuck lid of Ninja Creami.
Why Does the Ninja Creami Lid Get Stuck?
If you want to troubleshoot the Ninja Creami lid sticking issue, you need to understand what is the culprit behind it. There might be several reasons like overfilling, moisture buildup, dried food debris, etc. Let’s understand them:
Moisture/Ice Buildup
Moisture or ice can accumulate around the lid’s seal, especially around the paddle and the motor base connection. It can freeze over time and create an icy bond (especially if you store the appliance in a cold place). This ice buildup effectively glues the lid to the machine, making it difficult to remove.
Food Debris or Dried Ice
Leftover food particles or residue from dried ice can harden and make it difficult to open the lid of the machine. These hardened bits can obstruct the lid’s release and prevent getting off the Ninja Creami lid.
Overfilling
Filling the pint past the maximum fill line can cause excess pressure inside the container. When you blend ice or frozen ingredients, they expand while blending. This expansion can create pressure against the lid, causing it to stick firmly.
Temperature Differences
A significant temperature difference between the extremely cold pint and the warm spindle can create a vacuum effect. This vacuum can make the lid seem stuck, as the pressure inside and outside the container is uneven.
Consecutive Usage Without Cleaning
Using the Ninja Creami repeatedly without cleaning can lead to food buildup and strain the locking system. Moisture, food debris, and temperature differences all contribute to a stuck lid.
In my case, I haven’t cleaned my Ninja Creami regularly. That’s why food particles and ice were built around the blade and spindle. Follow the next section on how I have fixed it.
5 Steps to Fix a Stuck Ninja Creami Lid

If your Ninja Creami lid is stuck, don’t panic! These simple steps will guide you through safely removing a stuck lid and get you back to enjoying your frozen treats.
Step 1: Detach the Container
First, unplug the Ninja Creami and carefully remove the outer bowl containing the frozen pint from the machine. This isolates the lid and allows you to focus on freeing it without the added weight of the pint. Also, it allows you to examine the lid and the locking mechanism closely for any visible damage or obstruction.
Step 2: Let It Warm to Room Temperature
Sometimes, your lid might stuck due to frozen moisture or ice buildup around the seal. If you’ve recently used your Ninja Creami, let the container and lid sit at room temperature for about 10-15 minutes. This gentle warming can help loosen any ice or frozen residue that’s causing the sticking. This is often enough to release the lid.
Step 3: Unlatch the Blade
If warming doesn’t work, try unlatching the Ninja Creami blade. Sometimes, the blade can create additional suction or pressure that keeps the lid firmly in place. Press the blade release mechanism to unlatch the blade from the container. This separates the blade from the lid, often frees the stuck components, and creates more space to open the lid.
Step 4: Clean, Dry Thoroughly and Lubrication
Once the lid is detached, thoroughly clean the lid, container, and sealing area. Food debris, ice crystals, or dried ice cream can cause the lid to get stuck over time. Then wash the lid with warm soapy water, scrubbing away any residue.
Dry it completely to ensure no moisture remains, as wet parts could freeze again. After drying, apply a small amount of food-safe lubricant to the seal or grooves to reduce friction and prevent the lid from getting stuck again.
Step 5: Apply a Preventive Measure
After fixing the stuck lid, it’s important to take a few steps to prevent it happening again. This includes respecting the fill line, drying all parts after use, and cleaning regularly. These simple habits will save you future frustration.
5 Effective Tips to Prevent a Stuck Ninja Creami Lid
You can prevent sticking the Ninja Creami lid to the machine again by following a few secret tips. These simple tips will keep your machine running smoothly and your desserts flowing:
- Don’t Overload the Blender: Overfilling is a major culprit behind the Ninja Creami lid or cap stuck on the machine. Frozen fruits and ingredients expand when you blend them, creating pressure against the lid. So, always stay within the designated fill line inside the pint.
- Clean Regularly: Regular cleaning prevents hardened food particles from acting like glue. Clean your Creami after every few uses, or more frequently if you’re making sticky mixtures.
- Dry Everything Thoroughly: Moisture is the enemy. After washing, completely dry all parts, especially the paddle and the area where it connects to the motor base. This prevents ice from forming and sticking to the lid.
- Allow a Short Thaw (If Needed): For extremely hard-frozen mixtures, let the pint sit at room temperature for a few minutes before processing. This slight thaw reduces stress on the machine and prevents pressure buildup.
- Store Components Properly: When not in use, store the lid and other parts separately and completely dry. This prevents moisture from getting trapped and causing future sticking issues.
Remember that I always recommend Kitchen Comfy fans to follow the Ninja Creami user manual and contact their support team.
Conclusion
I know a Ninja Creami lid stuck on the machine can be annoying, but it doesn’t have to ruin your dessert experience. That’s why, I have shared my personal expertise on how I have unstuck the lid or cap of the Ninja Creami.
You can also follow the same 5 steps: detaching the container, letting it warm up, cleaning it well, and using a little lubricant to fix it. Also, you have got 5 reasons which may help to address what exactly happened with it.
Additionally, you can follow 5 effective tips to prevent a stuck Ninja Creami lid. Regular maintenance will help prevent the lid from getting stuck again. Still, if you have any issues with the Ninja Creami lid, contact their official support or drop a comment now.
FAQs
Why is My Ninja Creami Lid Stuck?
Several causes might be behind your Ninja Creami lid stuck on the machine. Overfilling the pint is a common reason, as frozen ingredients expand. Moisture buildup, food debris, or significant temperature differences may also contribute to the issues.
How Do You Get a Ninja Lid Unstuck?
To unstick a Ninja Creami lid or cap, try detaching the container, warming it to room temperature, and unclipping the blade. Clean the lid and seal, then dry everything thoroughly. Applying food-safe lubricant can help prevent it from sticking again.
How Do You Fix a Jammed Ninja Creami?
If your Ninja Creami is jammed, start by detaching the container and letting it warm slightly. Carefully unlatch the blade, then clean all parts to remove any debris or food buildup. Dry everything completely before reassembling to fix the jam. If the machine itself is jammed, consult the user manual or contact customer support.

JAKARIA is a seasoned expert in kitchen appliances and cooking techniques. With years of hands-on experience and in-depth knowledge, he has a knack for solving common kitchen appliance issues. He also offers expert guidance to help you achieve culinary success and create amazing meals effortlessly.

![10 Tips to Keep Your Small Kitchen Clutter-Free [Checklist]](https://kitchencomfy.com/wp-content/uploads/2023/08/How-do-I-keep-my-small-kitchen-clutter-free-1.webp)

![3 Ways to Fix Ninja Creami Blade Falls Off Issue [100% Solved]](https://kitchencomfy.com/wp-content/uploads/2024/07/5-Reasons-for-Ninja-Creami-Blade-Falls-Off-3-Easy-Solution.webp)
