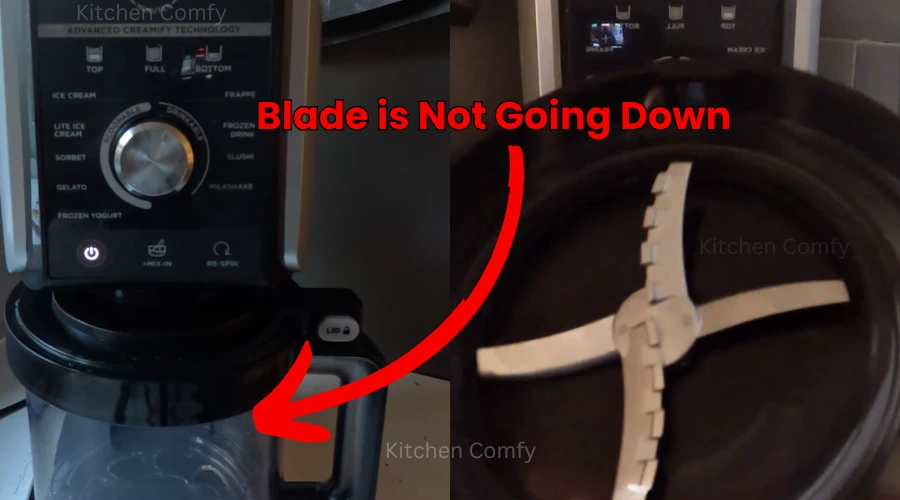
The Ninja Creami is one of the most popular appliances for homemade frozen treats. You also love this one for transforming frozen items into your favorite creamy creations, right? But the frustration comes when the Ninja Creami blade not going down and fails to make your creamy.
This issue often occurs due to a few culprits, such as hard-frozen mixture, obstructions around the spindle, or even trapped air bubbles. Don’t worry, there are several simple troubleshooting steps to fix the blade not going down the issue of the Ninja Creami.
In this blog post, I will share why your Ninja Creami blade is stuck or not going down and how to fix it at home.
Let’s get started!
Common Causes of the Ninja Creami Blade Not Going Down
Before starting Ninja Creami troubleshooting, it is crucial to identify why the problem happened. Understanding the root cause can help you fix the issue quickly and prevent it from happening again.
- Overly Frozen Mixture: If your pint is rock solid, the blade simply can’t move through it and can’t go down.
- Stuck Paddle/Spindle: Food residue or incorrect assembly can prevent the paddle or spindle (the part the blade attaches to) from turning. This blocks the blade’s downward movement.
- Trapped Air Bubbles: Large air pockets in the mixture can create resistance. So, it can make it hard for the blade to properly engage, move, and go down.
- Clogged Components: Bits of food can get stuck around the blade, spindle, or inside the bowl. This debris prevents the smooth operation of the Ninja Creami blade.
- Improper Assembly: If the bowl, lid, or blade assembly is/aren’t correctly aligned and locked, the machine won’t work, and the blade won’t go down.
So, addressing the root cause of the Ninja Creami blade issue and fixing it is an emergency to make your dessert.
6 Steps to Troubleshoot the Ninja Creami Blade Not Going Down
If your Ninja Creami blade isn’t moving, follow these six simple steps to fix the problem. These troubleshooting tips will help restore your machine’s performance quickly and effectively.
1. Soften the Mixture (Hard Ingredients)
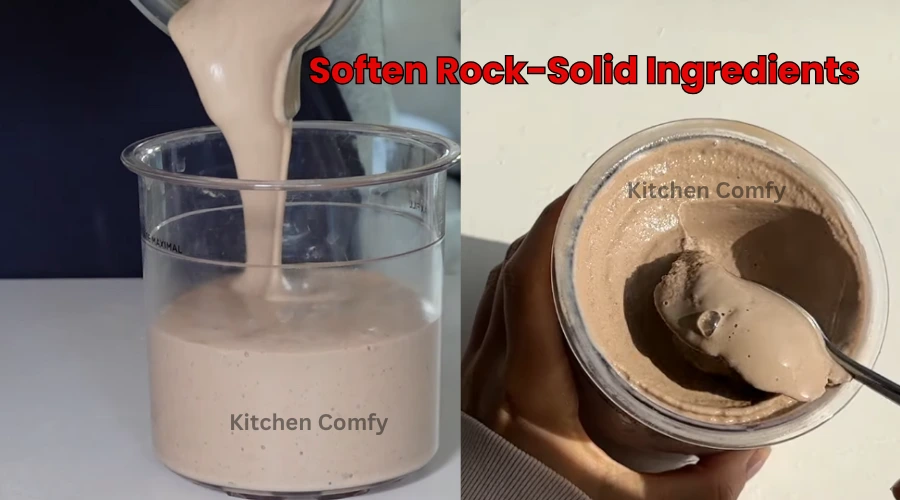
If your frozen mixture is too hard like a rock, it can stop the blade from moving and going down. So, take out the container and let it sit at room temperature for 10–20 minutes to thaw slightly. This softens the contents, making it easier for the blade and machine to crush ice and other hard ingredients.
2. Check for Obstructions
Obstructions like food debris or stuck ingredients can block the blade and prevent its movement. So, Carefully inspect the blade, the spindle (the part the blade attaches to), and the inside of the bowl. Look for any frozen chunks of food, ice crystals, or other debris that might be blocking the blade’s path.
Pay close attention to the area where the blade connects to the spindle. Then use a soft brush or a clean cloth to gently remove clogs. Always unplug the machine before handling sharp parts for safety.
3. Clean the Blade, Bowl, and Spindle
Residue buildup on the blade can cause it to stick. Carefully detach the blade from the Ninja Creami machine and rinse it with warm water. Also, you can add a few drops of mild soap and a sponge to clean it thoroughly. Once you have cleaned them, ensure they are properly dry before reassembling them into the Ninja Creami.
4. Check and Release Air Bubbles
Air bubbles in the mixture can create resistance, which can stop the blade from moving. To fix this, gently tap the container on a flat surface like the countertop a few times. You can also use a spoon or spatula to carefully stir the top layer of the mixture to release any trapped air.
5. Ensure Proper Assembly
Improperly assembled parts can prevent the Ninja Creami blade falls off, the blade stuck, and other malfunctioning. So, double-check that you’ve assembled the Ninja Creami correctly. Now, make sure the bowl is properly attached to the base of the Ninja Creami.
Also, check the lid is securely locked on the machine, and that the blade assembly is correctly attached to the spindle. Remember to read the official user manual during the troubleshooting assembly process of the Ninja Creami.
6. Test the Motor and Power Supply
If the blade still doesn’t move or going down, the motor or power supply could be the issue. Plug the machine into a working outlet and turn it on. Pay attention and try to listen for unusual sounds or inspect for a lack of power on the machine. If needed, perform a soft reset by unplugging the machine for a few minutes before restarting it.
By following these steps, you can fix the blade issue and enjoy using your Ninja Creami without interruptions! But if none of the above works to prevent the Ninja Creami blade not going down, it’s time to contact the Ninja Creami official support team.
Best Practices to Avoid Ninja Creami Blade Not Working Properly
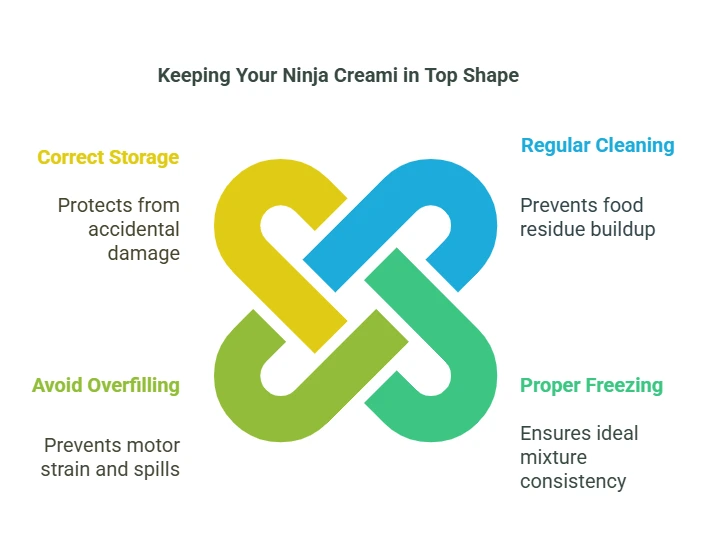
You can follow a few simple practices in your daily routine to keep your Ninja Creami running smoothly and prevent future blade issues.
- Regular Cleaning and Maintenance: Clean your Ninja Creami after each use. This prevents food residue from building up and interfering with the blade’s operation. Also, wash all removable parts with warm, soapy water and dry them thoroughly before reassembling.
- Proper Freezing: The consistency of your frozen mixture is crucial. Freeze your ingredients for the recommended time (usually 24 hours) to achieve the ideal texture. The mixture should be solid but not rock hard. So, avoid refreezing melted mixtures, as this can create ice crystals that hinder the blade.
- Avoid Overfilling: Do not fill the pint container past the maximum fill line. Overfilling can put extra strain on the motor and prevent the blade from engaging properly. It can also lead to messy spills and uneven processing.
- Storing the Appliance Correctly: When not in use, store your Ninja Creami in a clean, dry place. It will also help to keep your kitchen clutter-free even if it is a small kitchen. So. disassemble the blade assembly and store it separately to prevent accidental damage.
These easy steps will keep your Ninja Creami in great shape for making smooth, delicious frozen treats!
Conclusion
Now you have at the end of the Ninja Creami blade is not going down, blog. Usually, this issue is caused by simple problems like improper assembly or food buildup. So, check that all parts are correctly aligned and securely locked in place. And, cleaning the machine thoroughly can also resolve many issues.
Sometimes, the blade struggles due to frozen ingredients being too hard. To fix this, let the mixture thaw for a few minutes before using. Overfilling the container can also put extra strain on the blade. Always stick to the max fill line to avoid the Ninja Creami lid stuck on the machine or the blade not going down.
Remember, regular maintenance and proper use are key to keeping your Ninja Creami running smoothly. If the blade still doesn’t go down, contact customer support for further assistance.
FAQs
How to Put the Ninja Creami Blade Back in?
If your Ninja Creami blade falls off, you need to align the blade assembly with the base unit to put it back in. Ensure the notches on the blade line up with the slots on the machine. Gently press the blade into the spindle of the Ninja Creami and attach it. Double-check that the blade is securely attached before using the appliance.
Why Won’t My Ninja Blender Blade Spin?
If the Ninja blender blade isn’t spinning, there could be several reasons. Check if the Ninja Creami jar is properly aligned and locked into the right place. Then ensure no food or debris is blocking the blade. Also, verify that the motor base is functioning and the lid is securely closed.
How Do You Secure a Ninja Blender Blade?
To secure the Ninja blender blade, place it on the base and turn it clockwise until it’s firmly locked. Ensure the lid and jar are properly aligned, as they help keep the blade in position. Always double-check for a tight fit before blending.
Related Posts

JAKARIA is a seasoned expert in kitchen appliances and cooking techniques. With years of hands-on experience and in-depth knowledge, he has a knack for solving common kitchen appliance issues. He also offers expert guidance to help you achieve culinary success and create amazing meals effortlessly.
![Can You Put a Paper Plate in an Air Fryer – [Best Alternatives]](https://kitchencomfy.com/wp-content/uploads/2025/01/can-you-put-a-paper-plate-in-an-air-fryer.webp)